This is the blogger gadget which you will not get on any other site or blog, as it is recently introduced by our team. This is Jquery lava lamp or floating bubble menu bar with six different colors, it is critically cool and interactive gadget. The main feature of Lava lamp is it has an effect a bubble is visible behind the 1 link ( "HOME") and as you hover your cursor over other link title the bubble slides to that link title.It looks awesome and it is smooth too.

ADD LAVA LAMP FLOATING BUBBLE MENU BAR TO YOUR BLOG
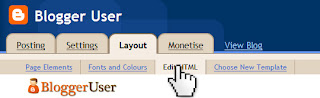
2). Select Layout and Edit HTML.
]]></b:skin>
4). Copy and Paste the given code directly above/before the code you have searched.
/*LAVALAMP START*/
.lavalamp {
position: relative;
border: 1px solid #d6d6d6;
background: #fff;
padding: 15px;
-webkit-box-shadow: 0 3px 6px rgba(0,0,0,.25);
-moz-box-shadow: 0 3px 6px rgba(0,0,0,.25);
border-radius : 10px;
-moz-border-radius : 10px;
-webkit-border-radius : 10px;
background : -webkit-gradient(linear, left top, left bottom, from(rgb(240,240,240)), to(rgb(204,204,204)));
background : -moz-gradient(linear, left top, left bottom, from(rgb(240,240,240)), to(rgb(204,204,204)));
height: 18px;
}
.magenta {
background : rgb(190,64,120);
background : -webkit-gradient(linear, left top, left bottom, from(rgb(190,64,120)), to(rgb(177,24,91)));
background : -moz-gradient(linear, left top, left bottom, from(rgb(190,64,120)), to(rgb(177,24,91)));
border: 1px solid #841144;
}
.cyan {
background : rgb(64,181,197);
background : -webkit-gradient(linear, left top, left bottom, from(rgb(64,181,197)), to(rgb(7,165,187)));
background : -moz-gradient(linear, left top, left bottom, from(rgb(64,181,197)), to(rgb(7,165,187)));
border: 1px solid #2f8893;
}
.yellow {
background : rgb(255,199,79);
background : -webkit-gradient(linear, left top, left bottom, from(rgb(255,199,79)), to(rgb(255,188,43)));
background : -moz-gradient(linear, left top, left bottom, from(rgb(255,199,79)), to(rgb(255,188,43)));
border: 1px solid #c08c1f;
}
.orange {
background : rgb(255,133,64);
background : -webkit-gradient(linear, left top, left bottom, from(rgb(255,133,64)), to(rgb(255,107,24)));
background : -moz-gradient(linear, left top, left bottom, from(rgb(255,133,64)), to(rgb(255,107,24)));
border: 1px solid #c04f11;
}
.dark {
background : rgb(89,89,89);
background : -webkit-gradient(linear, left top, left bottom, from(rgb(89,89,89)), to(rgb(54,54,54)));
background : -moz-gradient(linear, left top, left bottom, from(rgb(89,89,89)), to(rgb(54,54,54)));
border: 1px solid #272727;
}
.magenta li a , .cyan li a, .yellow li a , .orange li a, .dark li a{
color: #fff;
text-shadow: 0 -1px 0 rgba(0,0,0,.40);
}
a {
text-decoration: none;
color: #262626;
line-height: 20px;
}
ul {
margin: 0;
padding: 0;
z-index: 300;
position: absolute;
}
ul li {
list-style: none;
float:left;
text-align: center;
}
ul li a {
padding: 0 20px;
text-align: center;
}
.floatr {
position: absolute;
top: 10px;
z-index: 50;
width: 70px;
height: 30px;
border-radius : 8px;
-moz-border-radius : 8px;
-webkit-border-radius : 8px;
background : rgba(0,0,0,.20);
-webkit-transition: all .4s ease-in-out;
-moz-transition: all .4s ease-in-out;
}
/*End Lavalamp Css Info @ http://www.pcleaks.blogspot.com */
5). Find the following piece of code in your blog HTML code.

<ul>
<li class="active"><a href="/">Home</a></li>
<li><a href="Link-Here">About</a></li>
<li><a href="Link-Here">Blog</a></li>
<li><a href="Link-Here">Services</a></li>
<li><a href="Link-Here">Portfolio</a></li>
<li><a href="Link-Here">Contacts</a></li>
<li><a href="Link-Here">Back to Article</a></li>
<li><a href="Link-Here">How it Works?</a></li>
</ul>
<div class="floatr"></div></div>
ADD LAVA LAMP FLOATING BUBBLE MENU BAR TO YOUR BLOG
1). Open your blog and go to Dashboard.
3). Find the following piece of code in your blog HTML code. HOW TO FIND CODE IN YOUR BLOG HTML CODE
NOTE :- Before making any changes you should backup your blog template code. HOW TO BACKUP YOUR BLOG TEMPLATE
/*LAVALAMP START*/
.lavalamp {
position: relative;
border: 1px solid #d6d6d6;
background: #fff;
padding: 15px;
-webkit-box-shadow: 0 3px 6px rgba(0,0,0,.25);
-moz-box-shadow: 0 3px 6px rgba(0,0,0,.25);
border-radius : 10px;
-moz-border-radius : 10px;
-webkit-border-radius : 10px;
background : -webkit-gradient(linear, left top, left bottom, from(rgb(240,240,240)), to(rgb(204,204,204)));
background : -moz-gradient(linear, left top, left bottom, from(rgb(240,240,240)), to(rgb(204,204,204)));
height: 18px;
}
.magenta {
background : rgb(190,64,120);
background : -webkit-gradient(linear, left top, left bottom, from(rgb(190,64,120)), to(rgb(177,24,91)));
background : -moz-gradient(linear, left top, left bottom, from(rgb(190,64,120)), to(rgb(177,24,91)));
border: 1px solid #841144;
}
.cyan {
background : rgb(64,181,197);
background : -webkit-gradient(linear, left top, left bottom, from(rgb(64,181,197)), to(rgb(7,165,187)));
background : -moz-gradient(linear, left top, left bottom, from(rgb(64,181,197)), to(rgb(7,165,187)));
border: 1px solid #2f8893;
}
.yellow {
background : rgb(255,199,79);
background : -webkit-gradient(linear, left top, left bottom, from(rgb(255,199,79)), to(rgb(255,188,43)));
background : -moz-gradient(linear, left top, left bottom, from(rgb(255,199,79)), to(rgb(255,188,43)));
border: 1px solid #c08c1f;
}
.orange {
background : rgb(255,133,64);
background : -webkit-gradient(linear, left top, left bottom, from(rgb(255,133,64)), to(rgb(255,107,24)));
background : -moz-gradient(linear, left top, left bottom, from(rgb(255,133,64)), to(rgb(255,107,24)));
border: 1px solid #c04f11;
}
.dark {
background : rgb(89,89,89);
background : -webkit-gradient(linear, left top, left bottom, from(rgb(89,89,89)), to(rgb(54,54,54)));
background : -moz-gradient(linear, left top, left bottom, from(rgb(89,89,89)), to(rgb(54,54,54)));
border: 1px solid #272727;
}
.magenta li a , .cyan li a, .yellow li a , .orange li a, .dark li a{
color: #fff;
text-shadow: 0 -1px 0 rgba(0,0,0,.40);
}
a {
text-decoration: none;
color: #262626;
line-height: 20px;
}
ul {
margin: 0;
padding: 0;
z-index: 300;
position: absolute;
}
ul li {
list-style: none;
float:left;
text-align: center;
}
ul li a {
padding: 0 20px;
text-align: center;
}
.floatr {
position: absolute;
top: 10px;
z-index: 50;
width: 70px;
height: 30px;
border-radius : 8px;
-moz-border-radius : 8px;
-webkit-border-radius : 8px;
background : rgba(0,0,0,.20);
-webkit-transition: all .4s ease-in-out;
-moz-transition: all .4s ease-in-out;
}
/*End Lavalamp Css Info @ http://www.pcleaks.blogspot.com */
5). Find the following piece of code in your blog HTML code.
</head>
6). Copy and Paste the given code directly above/before the code you have searched.
<script src='https://ajax.googleapis.com/ajax/libs/jquery/1.6.1/jquery.min.js' type='text/javascript'/>
7). The most important step, Save your template carefully. Now,
8). Go to Dashboard > Design and select Page Elements. We will add menu bar below your header

If you dont have this section, see how to add it. ADD FULL WIDTH COLOUMN GADGETS TO BLOGGER
9). Select 'add a gadget' and add HTML/Javascript, copy and paste the following code.
<div class="lavalamp" >
<ul>
<li class="active"><a href="/">Home</a></li>
<li><a href="Link-Here">About</a></li>
<li><a href="Link-Here">Blog</a></li>
<li><a href="Link-Here">Services</a></li>
<li><a href="Link-Here">Portfolio</a></li>
<li><a href="Link-Here">Contacts</a></li>
<li><a href="Link-Here">Back to Article</a></li>
<li><a href="Link-Here">How it Works?</a></li>
</ul>
<div class="floatr"></div></div>
NOTE :- Replace "Link-Here" with your links and text("HOME") with your text.
NOTE :- You can simply change the color with any of the six colors, just replace the code highlighted in the above code with any of the given code.
<div class="lavalamp magenta" >
<div class="lavalamp cyan" >
<div class="lavalamp yellow" >
<div class="lavalamp orange" >
<div class="lavalamp dark" >
<div class="lavalamp cyan" >
<div class="lavalamp yellow" >
<div class="lavalamp orange" >
<div class="lavalamp dark" >
After you have selected the color and added your links, SAVE the HTML/Javascript gadget and make sure the cross coloumn section must be below header.
If you got a good experience than leave comments and Email Me for any assistance.


No comments:
Post a Comment