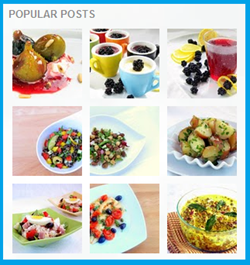
As we have been introducing new gadgets for bloggers and this time also we had introduced a gadget which will help you a lot in blogging. We had introduced Grid layout for popular posts in the sidebar, as a result the blog user can easily find the best posts in the blog, they will not have to search it. In this popular posts gadget 9 popular posts will be displayed along with their thumbnail. Isn't it interesting, you must want it.

ADD GRID LAYOUT POPULAR POST GADGET TO YOUR BLOG
1). Go to Dashboard > Design and select Page Elements.
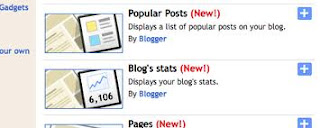
2). Select 'add a gadget' Popular Post.


4). Select Layout and Edit HTML.

6). Replace the following code with the code you have searched.

ADD GRID LAYOUT POPULAR POST GADGET TO YOUR BLOG
1). Go to Dashboard > Design and select Page Elements.
2). Select 'add a gadget' Popular Post.

3). Edit 'Gadget setting' to display thumbnail not snippet.

4). Select Layout and Edit HTML.

5). Find the following piece of code in your blog HTML code. HOW TO FIND CODE IN YOUR BLOG HTML CODE
<b:widget id='PopularPosts1' locked='false' title='Popular Posts' type='PopularPosts'/>
NOTE :- Before making any changes you should backup your blog template code. HOW TO BACKUP YOUR BLOG TEMPLATE
<b:widget id='PopularPosts1' locked='false' title='Popular Posts' type='PopularPosts'>
<b:includable id='main'>
<b:if cond='data:title'><h2><data:title/></h2></b:if>
<div class='widget-content popular-posts'>
<ul>
<b:loop values='data:posts' var='post'>
<li>
<b:if cond='data:showThumbnails == "false"'>
<b:if cond='data:showSnippets == "false"'>
<!-- (1) No snippet/thumbnail -->
<a expr:href='data:post.href'><data:post.title/></a>
<b:else/>
<!-- (2) Show only snippets -->
<div class='item-title'><a expr:href='data:post.href'><data:post.title/></a></div>
<div class='item-snippet'><data:post.snippet/></div>
</b:if>
<b:else/>
<b:if cond='data:showSnippets == "false"'>
<!-- (3) Show only thumbnails -->
<div class='item-thumbnail-only'>
<div class='item-thumbnail'>
<a expr:href='data:post.href' expr:title='data:post.title'>
<b:if cond='data:post.thumbnail'>
<img alt='' border='0' expr:height='data:thumbnailSize' expr:src='data:post.thumbnail' expr:width='data:thumbnailSize'/>
<b:else/>
<img alt='' border='0' expr:height='data:thumbnailSize' src='https://blogger.googleusercontent.com/img/b/R29vZ2xl/AVvXsEisD_ZYBRDG1J8qxXfeC1wQ265EG4HFOIpZPXsyn7SyR0hwMsZ1mf5sH5RTdKr_uO4d4uUfTEyaHTJCyyBd6I4QA7HuW9ZYVZbJm5NwqhATn38WZqITDTiAAYUC_BfgHNOtv79COWebBI8/s72-c/default.png' expr:width='data:thumbnailSize'/>
</b:if>
</a>
</div>
</div>
<b:else/>
<!-- (4) Show snippets and thumbnails -->
<div class='item-content'>
<b:if cond='data:post.thumbnail'>
<div class='item-thumbnail'>
<a expr:href='data:post.href' target='_blank'>
<img alt='' border='0' expr:height='data:thumbnailSize' expr:src='data:post.thumbnail' expr:width='data:thumbnailSize'/>
</a>
</div>
</b:if>
<div class='item-title'><a expr:href='data:post.href'><data:post.title/></a></div>
<div class='item-snippet'><data:post.snippet/></div>
</div>
<div style='clear: both;'/>
</b:if>
</b:if>
</li>
</b:loop>
</ul>
<b:include name='quickedit'/>
</div>
</b:includable>
</b:widget>
7). Save your template.
8). Go to Template Designer > Advanced > Add Css and paste the given code at the last.
.popular-posts .item-thumbnail{float:left;}
.popular-posts ul{padding-left:0px;}
.popular-posts ul li {list-style-image: none;list-style-type: none;display:inline;}
9). Select 'Apply To Blog' from the right top.
If you got a good experience than leave comments and Email Me for any assistance.


No comments:
Post a Comment