In this post our team had introduced a conventional style of a vertical drop down navigation bar. It has a mixture of red and silver which gives it a awesome look. There is a image below :-

HOW TO ADD RED DROP DOWN MENU
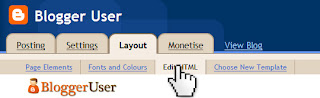
2). Select Layout and Edit HTML.
]]></b:skin>
NOTE :- Before making any changes you should backup your blog template code. HOW TO BACKUP YOUR BLOG TEMPLATE


HOW TO ADD RED DROP DOWN MENU
1). Open your blog and go to Dashboard.
3). Find the following piece of code in your blog HTML code using Ctrl+F
]]></b:skin>
NOTE :- Before making any changes you should backup your blog template code. HOW TO BACKUP YOUR BLOG TEMPLATE
4). Paste the following code just above/before the code you have searched
/*Start Css Menu*/
.menu{
border:none;
border:0px;
margin:0px;
padding:0px;
font-family:verdana,geneva,arial,helvetica,sans-serif;
font-size:14px;
font-weight:bold;
color:8e8e8e;
}
.menu ul{
background:url(https://blogger.googleusercontent.com/img/b/R29vZ2xl/AVvXsEjTplc511jVF0l7RTEmvNa4n-fObnDss32YGNb3oZC1gKM31jtQyj3Wk080-YnWmGtD3tHAcIpiXDBSIccjV6ZMRLahqgpXO1U6ueMVYj8rZu7FYvrdiCLM_wgsMqPz9BDunTw-quQNHghY/s1600/menu-bg.gif) top left repeat-x;
height:43px;
list-style:none;
margin:0;
padding:0;
}
.menu li{
float:left;
padding:0px 8px 0px 8px;
}
.menu li a{
color:#666666;
display:block;
font-weight:bold;
line-height:43px;
padding:0px 25px;
text-align:center;
text-decoration:none;
}
.menu li a:hover{
color:#000000;
text-decoration:none;
}
.menu li ul{
background:#e0e0e0;
border-left:2px solid #a80329;
border-right:2px solid #a80329;
border-bottom:2px solid #a80329;
display:none;
height:auto;
filter:alpha(opacity=95);
opacity:0.95;
position:absolute;
width:225px;
z-index:200;
/*top:1em;
/*left:0;*/
}
.menu li:hover ul{
display:block;
}
.menu li li {
display:block;
float:none;
padding:0px;
width:225px;
}
.menu li ul a{
display:block;
font-size:12px;
font-style:normal;
padding:0px 10px 0px 15px;
text-align:left;
}
.menu li ul a:hover{
background:#949494;
color:#000000;
opacity:1.0;
filter:alpha(opacity=100);
}
.menu p{
clear:left;
}
.menu #current{
background:url(https://blogger.googleusercontent.com/img/b/R29vZ2xl/AVvXsEj43h1jM5ct1WoC9rEbY3x2e_PWd_vgXJW2LWHQfpQUF855wVj7IFSIwgP8-53wWSEALAwGyRWfxP-ufvI7zHuNhou_YbvmzLxUYI6li5Ea_eqoV6kMIse4opdlrtZpo8S0t-NGUjgQ49av/s1600/current-bg.gif) top left repeat-x;
color:#ffffff;
}
/*End Css Menu from http://www.pcleaks.blogspot.com*/
5). The most important step, Save your template carefully. Now,
6). Go to Dashboard > Design and select Page Elements. We will be adding menu bar below your header.

If you don't have this section, see how to add it. ADD FULL WIDTH CROSS COLOUMN GADGETS TO
7). select Add a gadget and add HTML/javascript, copy and paste the following code.
<div class="menu">
<ul>
<li><a href="#" id="current">Home</a></li>
<li><a href="#" >Products</a>
<ul>
<li><a href="#">Drop Down CSS Menus</a></li>
<li><a href="#">Horizontal CSS Menus</a></li>
<li><a href="#">Vertical CSS Menus</a></li>
<li><a href="#">Dreamweaver Menus</a></li>
</ul>
</li>
<li><a href="/faq.php">FAQ</a>
<ul>
<li><a href="#">Drop Down CSS Menus</a></li>
<li><a href="#">Horizontal CSS Menus</a></li>
<li><a href="#">Vertical CSS Menus</a></li>
<li><a href="#">Dreamweaver Menus</a></li>
</ul>
</li>
<li><a href="/contact/contact.php">Contact</a></li>
</ul>
</div>
<ul>
<li><a href="#" id="current">Home</a></li>
<li><a href="#" >Products</a>
<ul>
<li><a href="#">Drop Down CSS Menus</a></li>
<li><a href="#">Horizontal CSS Menus</a></li>
<li><a href="#">Vertical CSS Menus</a></li>
<li><a href="#">Dreamweaver Menus</a></li>
</ul>
</li>
<li><a href="/faq.php">FAQ</a>
<ul>
<li><a href="#">Drop Down CSS Menus</a></li>
<li><a href="#">Horizontal CSS Menus</a></li>
<li><a href="#">Vertical CSS Menus</a></li>
<li><a href="#">Dreamweaver Menus</a></li>
</ul>
</li>
<li><a href="/contact/contact.php">Contact</a></li>
</ul>
</div>
This the code to create menu bar, replace the # with your links and text with your text.
If you got a good experience than leave comments and ask questions for any assistance.


No comments:
Post a Comment